
The FotoFinish Studio edition allows you to crop your images to custom shapes by selecting the Custom Shapes and Borders button at the bottom of the Crop Wizard panel. The Basic edition lacks this feature.
Choosing Custom Shapes and Borders in the Crop Wizard Panel
When you select Custom Shapes and Borders, FotoFinish presents the Cut Out Shape dialog, where you can choose from an array of ready-made Crop Shapes. (You can also add a border to the shape; for details see Borders & Frames.)
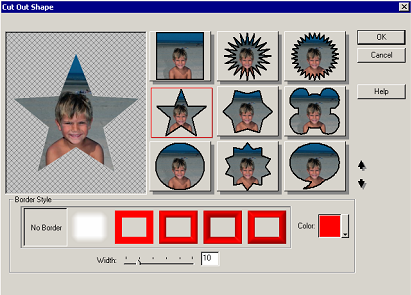
Choosing a Crop Shape
You’ll see a series of thumbnail previews showing what your image would look like in the currently selected Crop Shape. You can scroll through additional shapes by clicking on the black arrows at the lower right of the preview pane. Select a Crop Shape by clicking on one of the thumbnails, and then click OK.
Your image will now appear in the Work Area with a Cropping Frame shown on top of it. The gray area outside the frame will be discarded when you crop the image.
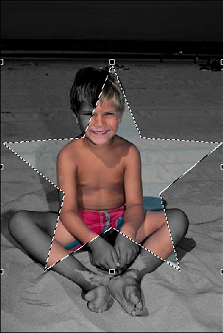
The Cropping Frame appears on your image
You can move the cropping frame by dragging it with the mouse or you can resize it by grabbing the black handles around its edges. The side handles allow you to stretch or shrink the image to any proportions. To preserve the original proportions, use the corner handles.

Move and resize your cropping frame
When you are satisfied with the position and size of your Crop Shape, click on the Crop Image button in the Wizard Panel to discard the part of your image that lies outside the shape.

The cropped image
The background color of your new image will be set to the currently selected Background Color defined in the Tool Settings Panel. If this background color is set to be transparent, you can overlay your cropped image on another image without obscuring the part outside the cropping frame.

Cropped image overlaid on another image